Self-priming pumps: how they work, types and selection criteria
A self-priming pump is a surface pump able to draw water from a source below it — pillow tank, well, borehole, reservoir — without being filled by hand at every start. Unlike a standard centrifugal pump, which must be primed manually (filled with water before each start), a self-priming pump has an air-evacuation mechanism that lets it re-prime itself after a stop. It is the standard solution for distributing water from a pillow tank to a watering network, an indoor circuit or an irrigation system. This guide covers what you need to know before buying: how it works, the types available, calculating total head, and choosing for your use.
- How a self-priming pump works
- The four types of self-priming pump
- Calculating total head: the key to correct sizing
- Interactive head calculator
- Selection criteria for your use
- Pairing a self-priming pump with a pillow tank
- Installation and ground rules
- Troubleshooting: common problems and fixes
- Frequently asked questions
How a self-priming pump works
To understand what makes a self-priming pump different, you first need to understand the problem it solves.
The problem of air in the suction line. A conventional centrifugal pump works by centrifugal force: water enters the impeller, is accelerated outwards and expelled at high pressure to the delivery side. The principle works well — but only if the suction line is completely full of water. If air gets in (on first start-up, after a long stop, or through a leak in the suction hose), the pump spins dry, fails to create enough vacuum and cannot draw water. It is said to have lost its prime.
The solution: an offset suction port. A self-priming pump solves this with a structural change to the casing: the suction port is offset from the impeller axis. That offset creates a zone of turbulence which mixes the air with the few centilitres of water left in the casing. The air-water mixture is expelled on the delivery side, gradually building vacuum on the suction side until it pulls water up from the source. The cycle repeats until all the air is gone and the pump is fully primed — usually 30 seconds to 2 minutes depending on the length of the suction hose.
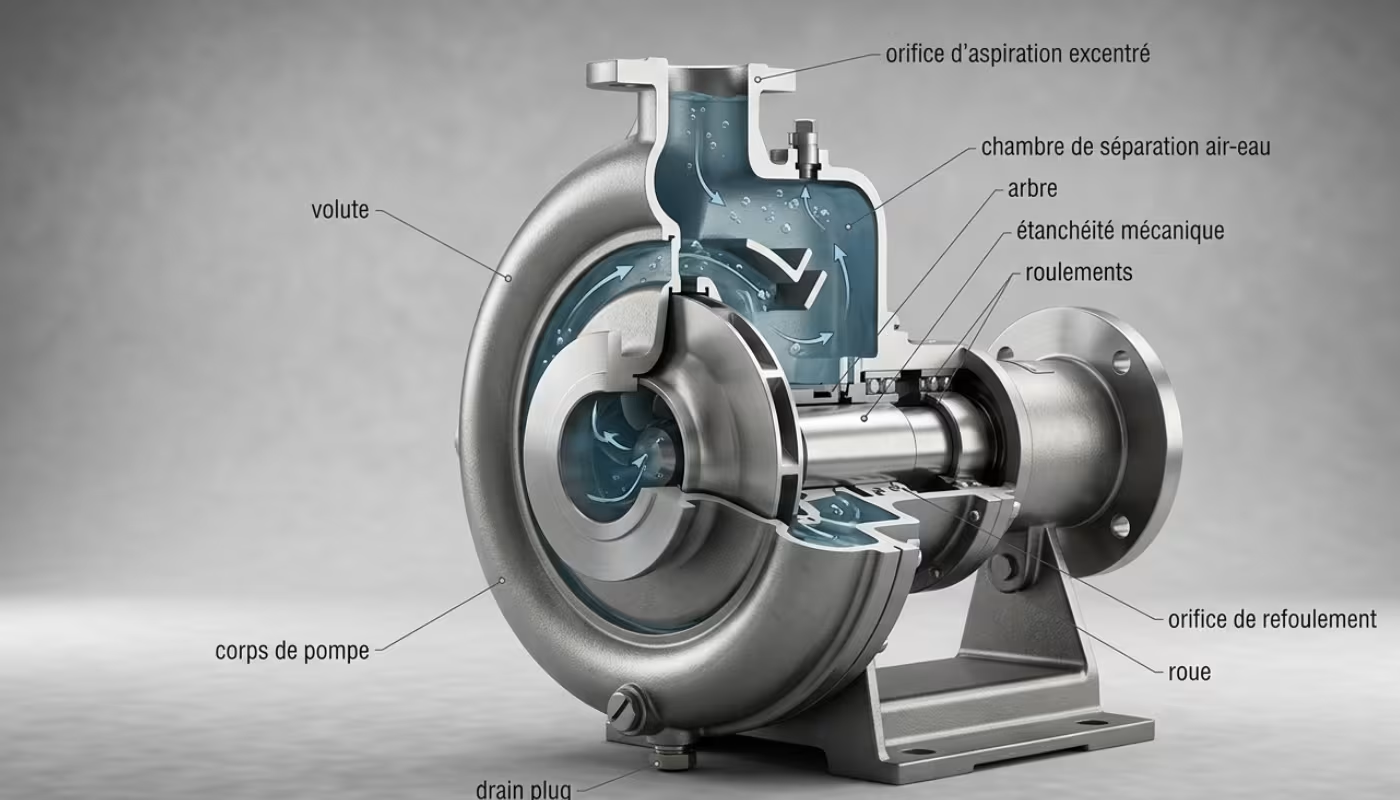
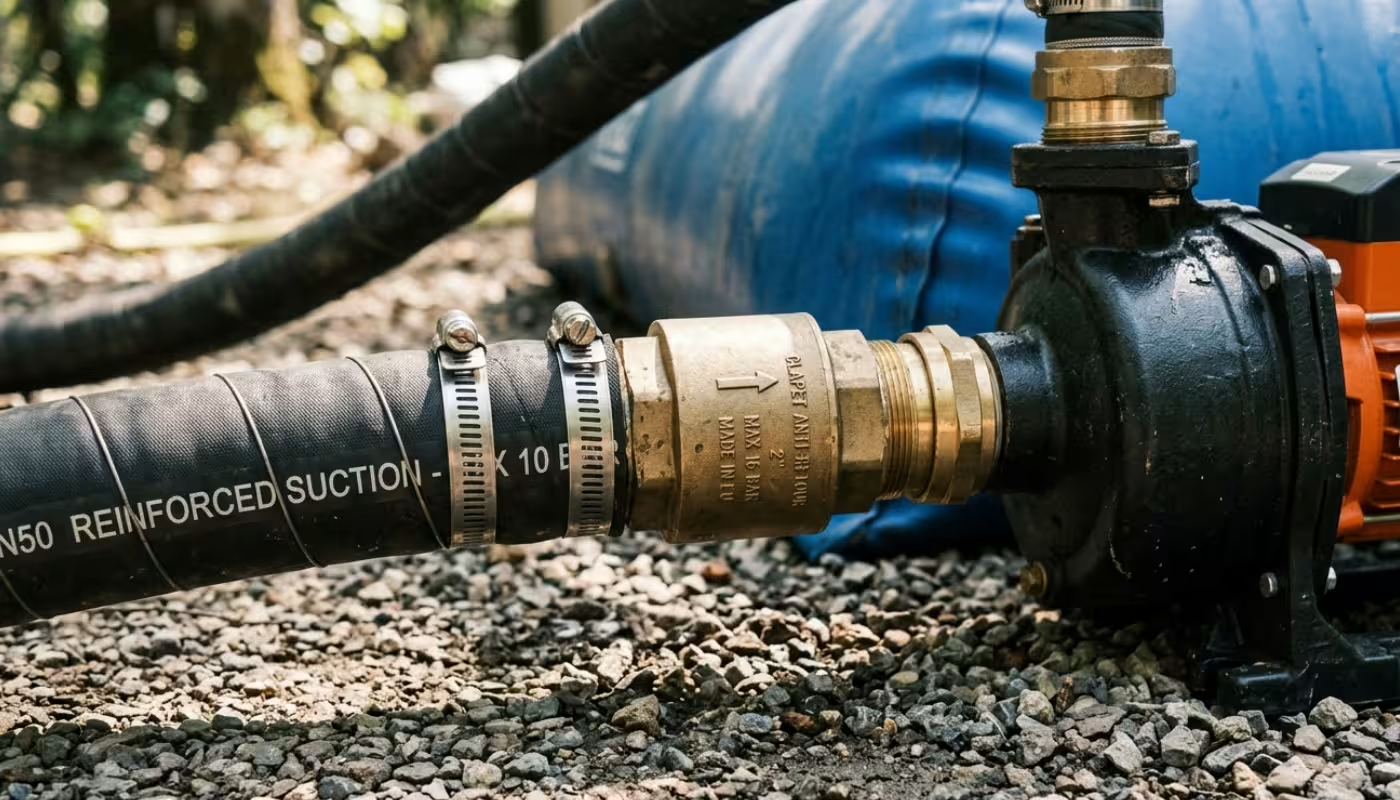
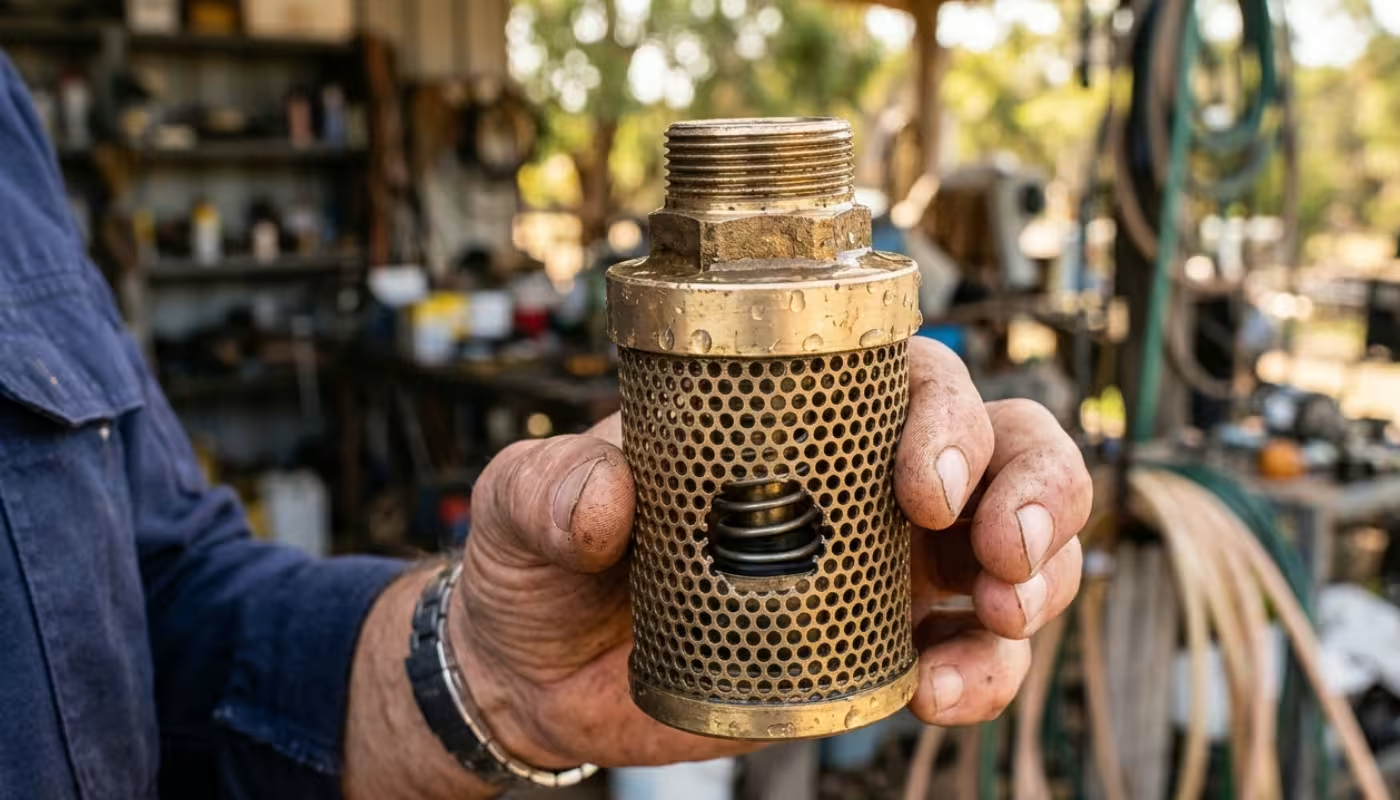
An essential condition: the non-return valve. For self-priming to work, the casing must always retain a little residual water. That is the job of the non-return valve (or foot valve strainer) fitted at the end of the suction hose, at the draw-off point in the tank or well. When the pump stops, this valve closes and stops water running back into the source, keeping the suction line full. Without a sound non-return valve, a self-priming pump has to be primed by hand at every start — and loses its main advantage.
💡 Remember: on first use, even a self-priming pump must be primed by hand: fill the casing and the suction hose up to the non-return valve with clean water before starting. After that, the valve maintains the prime automatically.
The four types of self-priming pump
All self-priming pumps share the same basic principle, but their internal technology varies with the intended application.
Type 1 — self-priming centrifugal pump (the most common)
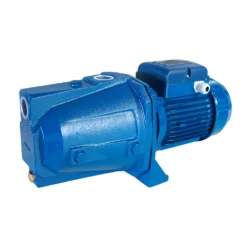
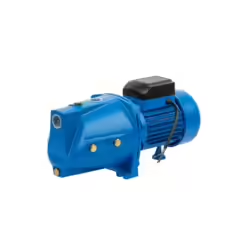
This is the reference technology for domestic and agricultural use. The casing is cast iron or stainless steel, the impeller engineering plastic or stainless. It covers most needs: watering from a tank, supply from a shallow well (< 8 m), filling a pool, drip irrigation. Typical flows: 1 to 10 m³/h. Max pressure: 2 to 6 bar. This is the type used in our range of Flocea self-priming pumps.
Type 2 — jet pump (ejector)
A jet pump uses an ejector (venturi) that recirculates part of the delivered flow to create suction vacuum. The result: a suction lift of 20 to 40 m (deep-well ejector) instead of the 8 m maximum of a standard centrifugal pump. It is the answer for wells 8 to 40 m deep. Drawback: lower hydraulic efficiency — 20 to 30% of the energy goes into recirculation.
Type 3 — peripheral pump (vortex)
The peripheral impeller (star or vortex type) sends the liquid on a helical path, generating higher pressure at low flow. Ideal where you need high pressure and modest flow: household supply (WC, washing machine), high-pressure micro-irrigation networks. Max pressure: up to 8 to 10 bar. Typical flow: 0.5 to 3 m³/h.
Type 4 — booster set with diaphragm vessel
Strictly speaking this is not a self-priming pump but a system combining a centrifugal pump with a pressurised diaphragm vessel. The pump only starts when pressure drops below a threshold, not every time a tap opens. Benefits: fewer starts and stops (motor life), steady pressure, no noise at each use. It is the recommended solution for supplying WCs and washing machines from a rainwater pillow tank.
| Type | Max suction lift | Typical flow | Max pressure | Typical use |
|---|---|---|---|---|
| Self-priming centrifugal | 8 m | 1–10 m³/h | 2–6 bar | Tank, shallow well, watering |
| Jet (ejector) | 20–40 m | 1–5 m³/h | 3–6 bar | Deep wells (8–40 m) |
| Peripheral (vortex) | 8 m | 0,5–3 m³/h | 6–10 bar | High-pressure indoor network |
| Booster set with diaphragm vessel | 8 m | 1–5 m³/h | 3–6 bar | Supplying WC and washing machine from a tank |
Calculating total head: the key to correct sizing
Total head is the single most important parameter when choosing a pump. It expresses, in metres (or in bar: 1 bar ≈ 10 m of water column), the total energy the pump must supply to move water from source to point of use.
Total head is calculated as follows:
Total head = suction lift + delivery height + required pressure + friction losses
Where:
- Suction lift = vertical distance between the water level at the source and the pump axis (limited to 7–8 m in practice)
- Delivery height = vertical distance between the pump axis and the highest point of use
- Required pressure = pressure needed at the point of use (for example 2 bar = 20 m for a watering can, 3–4 bar = 30–40 m for an indoor network)
- Friction losses = resistance of pipes, bends and valves (rule of thumb: 10–20% of total pipe length)
📍 Worked example: a buried pillow tank (water level 2 m below the pump), sprinkling at 5 m height, a 50 m run of DN25 pipe, desired pressure 2.5 bar.
- Suction lift = 2 m
- Delivery height = 5 m
- Required pressure = 25 m
- Estimated friction losses = 50 × 0.1 = 5 m
- Total head = 2 + 5 + 25 + 5 = 37 m
Choose a pump whose head/flow curve guarantees at least 37 m at your required flow. A pump rated “max pressure 4 bar” (= 40 m) delivering 3 m³/h at 37 m would be suitable.
⚠️ A common mistake: confusing the “maximum pressure” stated on the pump with the pressure at your working flow. On a pump curve, maximum pressure occurs at zero flow (closed pump). At real working flow, pressure is always lower. Always check the head/flow curve, not just the headline figure.
Interactive head calculator
Enter your figures to calculate your installation’s head and estimate the pump power required:
⚙️ Head calculator
Fill in the fields below to get your installation’s head and a pump recommendation.
Selection criteria for your use
Once head and flow are known, five further criteria refine the choice.
| Use | Recommended type | Power | Indicative flow | Automation |
|---|---|---|---|---|
| Garden watering from a pillow tank | Self-priming centrifugal | 0.75 kW | 2–4 m³/h | Optional |
| Agricultural drip irrigation | Self-priming centrifugal | 0.75–1.1 kW | 3–8 m³/h | Recommended (timer) |
| Supplying WC and washing machine (rainwater) | Booster set with diaphragm vessel | 0.75–1.1 kW | 2–4 m³/h | Essential (pressure controller) |
| Shallow well (< 8 m) | Self-priming centrifugal | 0.75 kW | 2–5 m³/h | Optional |
| Deep well (8–40 m) | Jet pump with deep-well ejector | 1.1–2.2 kW | 1–4 m³/h | Recommended |
| Transferring fuel / light effluents | Dedicated self-priming pump | 0.75–2.2 kW | 3–10 m³/h | No |
| Emptying a tank / dewatering | Self-priming sump pump | 0.25–0.75 kW | 5–20 m³/h | Optional (float switch) |
Single-phase 230 V or three-phase 380 V?
For domestic and agricultural use up to 2.2 kW, single-phase 230 V is amply sufficient and needs no special electrical installation. Three-phase 380 V is only necessary above 3 kW (large holdings, intensive pumping) or for three-phase motors salvaged from existing farm machinery. Our self-priming pumps come in 230 V single-phase and 380 V three-phase versions.
Pump casing: cast iron, stainless steel or thermoplastic?
- Cast iron: robust, economical, resists knocks and light abrasion. Drawback: rusts with acidic water (pH < 6.5) or seawater.
- Stainless steel 304 or 316L: resists corrosion and chlorine, ideal for slightly acidic rainwater and food-grade applications. Use 316L for marine environments or acidic effluents.
- Thermoplastic (PP, PVC): light, resistant to most acids and chemicals, economical. Lower mechanical strength — keep it for mechanically undemanding applications.
Pairing a self-priming pump with a pillow tank
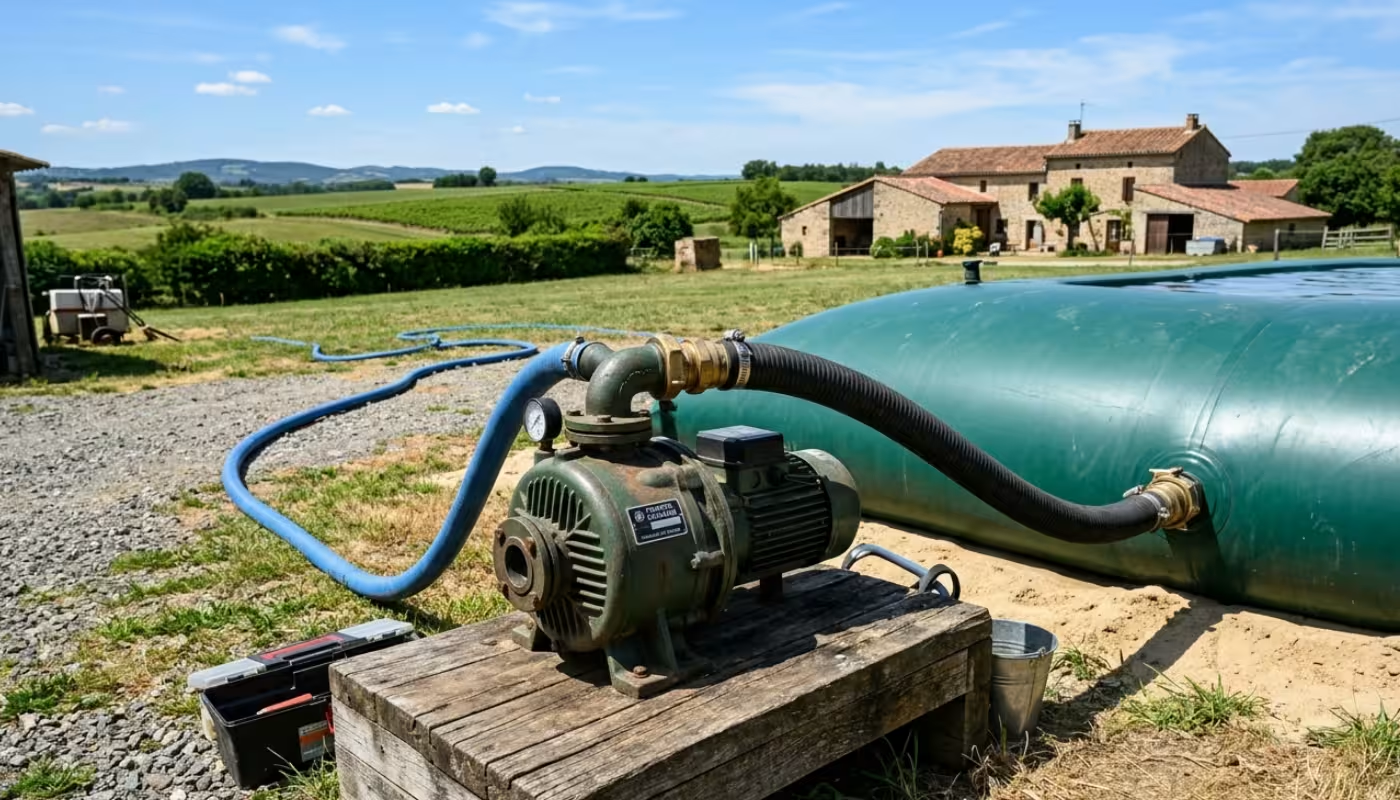
A self-priming pump is the accessory most often paired with a pillow tank. Here are the points specific to that set-up.
Where to place the pump relative to the tank
Ideally the pump sits level with the tank, or slightly above (up to 5 m of lift for comfortable operation). The lower the suction lift, the faster it re-primes and the more margin it keeps on its curve. If the tank is level with the pump or slightly higher, the pump works under positive suction (negative lift) — it primes even more easily, and even non-self-priming centrifugal pumps become an option.
Connecting to the pillow tank outlet
Flocea pillow tanks come with a standard outlet valve in DN 50 (2 inch) or DN 80 (3 inch) depending on the model. Connection to the pump is made via:
- a reinforced rubber or PVC spiral hose in DN 50 (tank side)
- a reducer DN 50 → DN 32 or DN 25 depending on your pump's suction port
- a non-return valve or foot valve strainer on the tank side (at the bottom or as a floating intake)
⚠️ Never reduce the diameter on the suction side: any reduction in the suction line increases friction losses and can prevent priming. Keep the diameter constant (or increasing) from tank to pump inlet. Reductions belong on the delivery side only.
Floating intake: the best solution for a pillow tank
As a pillow tank empties, its floor sinks and a strainer resting on the bottom can draw up accumulated deposits (algae, sediment in open tanks, particles). A floating intake solves this: the strainer is attached to a float that keeps the draw-off point near the surface, always taking the cleanest water. Flocea offers floating intake kits matched to its pillow tanks.
Automation: pressure controller or pressure switch?
For continuous supply (indoor network, WCs, washing machine), the pump must start and stop automatically on demand. Two options:
- Electronic pressure controller: starts the pump when a tap opens and stops it when it closes. Simple and cheap (€20–40), but the pump starts at every use, increasing wear where use is frequent.
- Diaphragm vessel (booster set): stores water under pressure in an 8 to 50 L vessel. The pump only starts when pressure falls below a threshold (say 2.2 bar), not at every tap. Motor life is significantly extended — the recommended choice for supplying a complete indoor network.
Installation and ground rules
Rule 1 — Suction hose diameter. The suction hose must never be narrower than the pump's suction port. In practice, use the same diameter or slightly larger. For a DN 32 (1¼") pump, use DN 32 or DN 40 hose. Never DN 25.
Rule 2 — Maximum suction hose length. Every metre of hose adds friction losses that cut effective suction. For a pump rated at 8 m maximum lift, total hose length (horizontal plus vertical) is around 15 to 20 m in DN 32. Beyond that, priming can become difficult.
Rule 3 — A sound non-return valve. This is the part behind most priming problems. Check it every season: it must seal tightly when the pump stops. A clogged or damaged valve lets water drain back to the source and empties the suction line. A cheap part (€3 to €10), worth replacing every two to three years under heavy use.
Rule 4 — Dry-running protection. A self-priming pump running dry (empty tank, failed valve) can overheat and burn out within minutes. Fit a differential pressure switch or a minimum-flow detector that cuts the supply if delivery pressure is not reached within 30 seconds. This protection is essential if the tank can run empty.
Rule 5 — Winterising. In cold areas, drain the pump and suction hose before frost. Residual water in the casing can freeze and crack a cast-iron volute. Stainless pumps cope better with frost, but draining is still advisable. Open the drain plug (usually at the bottom of the casing), let the water out, then close it. When recommissioning in spring, prime by hand (fill the casing) before the first start.
Troubleshooting: common problems and fixes
| Symptom | Likely causes | Fix |
|---|---|---|
| The pump runs but draws no water | Faulty non-return valve / suction lift too great / leak in the suction hose | Check the valve and the hose for leaks. Fill the casing by hand and restart. |
| Low flow, insufficient pressure | Worn or fouled impeller / suction hose too narrow / partly blocked valve | Clean or replace the impeller. Replace the valve. Increase the suction hose diameter. |
| The pump starts and stops in rapid cycles | Pressure controller misadjusted / diaphragm vessel under-inflated / leak in the delivery network | Check the controller setting. Re-inflate the diaphragm (pressure = 90% of cut-out pressure). Check the circuit for leaks. |
| Vibration and abnormal noise | Cavitation (lift too high or flow too low) / damaged impeller / foreign body in the pump | Reduce the suction lift. Increase the hose diameter. Remove and inspect the impeller. |
| The motor burns out quickly | Repeated dry running / electrical overvoltage / insufficient cooling | Fit dry-running protection. Check the mains voltage. Do not obstruct the cooling fins. |
Frequently asked questions about self-priming pumps
What is the difference between a self-priming pump and a submersible pump?
A self-priming pump is a surface pump: it sits outside the water and draws liquid through a hose. A submersible pump goes directly into the water, so it has no priming issue but requires access inside the tank or well. For pillow tanks, the self-priming type is generally preferred: it is easier to reach for maintenance and does not require opening the tank each time.
Can a self-priming pump handle dirty water (mud, sand)?
Standard self-priming centrifugal pumps are designed for clean or lightly loaded water. For dirty water (mud, sand, particles > 3 mm) you need a dedicated dirty-water pump with a free-passage impeller and an abrasion-resistant casing. Always check the data sheet: it states the maximum particle size and the liquids allowed.
My self-priming pump loses its prime after every stop. Why?
The cause is almost certainly a failed or missing non-return valve. When the pump stops, the valve should keep water in the suction line. If it is damaged, clogged or absent, the water drains back into the tank and empties the hose — the pump then has to prime from scratch at every start, which can take several minutes and wear the motor prematurely. Check and replace the non-return valve (a cheap part, €5–15).
Can a self-priming pump be left outdoors?
Yes, provided the pump is protected from the weather (canopy, weatherproof enclosure) and from frost (see winterising). Stainless pumps cope with outdoor damp better than cast iron, which can rust. IP44 protection is the recommended minimum outdoors. In cold regions, an enclosed shelter kept above freezing in winter is strongly advised to avoid frost damage.
What does a self-priming pump cost to run?
A 0.75 kW pump uses 0.75 kWh per hour of operation. At two hours of watering a day over a 90-day season that is 135 kWh a year, roughly €20–25 at standard rates. A 1.1 kW pump in the same conditions uses about 200 kWh a year. Running cost is therefore marginal — the deciding criterion is not electricity use but the match to your required head and flow.
Do you need a filter on the suction line?
A strainer (coarse filter with non-return valve) at the suction inlet is essential to protect the impeller from foreign bodies. However, never fit a fine filter on the suction line: once clogged it creates a pressure drop that prevents priming. Fine filters always belong on the delivery side, after the pump.
In summary — five rules for choosing your self-priming pump:
- Work out total head first (suction lift + delivery height + required pressure + friction losses) — it is the only parameter that really counts.
- Do not exceed 8 m of suction lift with a surface centrifugal pump — beyond that, choose a jet or submersible pump.
- A non-return valve on the suction line is essential — without it, the pump must be primed by hand at every start.
- Never reduce the hose diameter on the suction side — increase it if necessary.
- To supply an indoor network (WCs, washing machine), prefer a booster set with a diaphragm vessel over a simple pressure controller — motor life is significantly longer.
Flocea offers a range of self-priming pumps in 230 V single-phase and 380 V three-phase, selected specifically to pair with our pillow tanks. Our team can help you size the right pump for your installation. Get in touch or call +33 7 56 81 31 11.
Nos Pompes Auto Amorçantes
-

JET self-priming pump 220V 1.10kW / 1.5 hp
349,00€ HT Add to basket -
JET self-priming pump 380V 0.75kW / 1 hp three-phase
169,00€ HT Add to basket -
JET self-priming pump 230V 0.75kW / 1 hp
169,00€ HT Add to basket -
JET self-priming pump 230V 0.55kW / 0.8 hp
153,00€ HT Add to basket -
JET self-priming pump 380V 1.65kW / 2.2 hp
359,00€ HT Add to basket